
 In today’s online print selling environment, whether the product is photographic, graphics or created design, our customers around the world seek to achieve the right balance between print quality, production speed and profit.
Numerous conversations with our customers allow us to build up knowledge and share with you the important elements which make up a successful online print business.
Supporting tens of thousands of inkjet printing world-wide for 25 years, we have picked up a thing or two! Here are some easily avoided common mistakes and some useful advice to keep your print standards high and frustration levels low in 2025
Mistake 1: No Back Up / Plan B

Fact of life: Things go wrong and usually at the worst moment! For all of your important printing processes you need a back up in place to minimise downtime, and avoid monetary losses and damage to reputation.
Our Advice / Fix:
- It is good practice to run through your printing workflow and identify the possible failures and how you can plan for the least impact if and when things go wrong.
- For example, it is always a good idea to have two working printers in case one fails for any reason. If this is not possible, having use of a friends/colleagues printer or a printing service already in place that you know and trust can prove life savers!
- Also, remember to have all your images and related files backed up in at least two locations as well as cloud storage. Ensure regular back up intervals are scheduled to ensure your latest work is never lost.
- In short, get your back ups in place. Those who can recover quickly from any set back are more likely to retain clients and attract new ones.
Mistake 2: Printing via WiFi

Fine for small snaps and low-resolution documents, never rely on your WiFi printer connection to produce normal sized high quality photographic prints; connect via printer cable, and make sure that your printer driver is configured for printer cable – not wireless.
Our Advice / Fix:
- Whenever possible, eliminate transferring images via WiFi; camera to computer, scanner to computer, smartphone to computer for full image fidelity and tone with more reliable, consistent and fast image transfer speeds.
- Many customers have found that they have installed the printer driver using WiFi, which has resulted in a printer driver that has limited functionality and partially printed images. This does tend to be more of a Mac issue although we have seen many PCs affected.
- An extract from the Epson website: “When connecting an Epson printer for the first time to a Macintosh running Mac OSX 10.10 (Yosemite) or later an AirPrint printer is added automatically which will limit the settings available for printing.”
- We recommend to always connect to your printer using a cable whether you use a Mac or PC. For high-end photo printing take no risks, use a cable. Most modern inkjet printers allow you to disable wi-fi connectivity also.
Mistake 3: Trying to print what you see on screen

Never assume that your computer monitor is accurate for colour, density and tone. It’s almost a certainty that unless you’ve calibrated your monitor recently the colours displayed will not be accurate. Most people have the brightness set too high, perception of colour varies from person to person, and as your monitor gets older the colours will degrade.
Most monitors show your work in the ballpark of 72 – 144ppi, so images appear softer or even out of focus until printed out at high resolution, leading to think that we must adjust every image using ‘unsharp mask’ or ‘sharpen’ tools. Cheap, low spec monitors often struggle to convey a full gamut of inkjet colours even when new. In addition, many screens (particularly basic laptops) show a different brightness depending on your viewing angle! So, inaccurate prints are often the result of the photographer making adjustments guided by an incorrectly calibrated or inadequate monitor.
Our Advice / Fix:
- Our advice is to ensure that your colour inkjet printer is accurate first and then adjust your monitor visually to agree as best as you can against your accurate colour print, keeping your viewing angle constant. If your printer is producing inaccurate colour, check that all printer colour channels are functioning by performing a nozzle check; if not perfect, run the “clean printhead” function, then repeat your test. Once a perfect nozzle check is achieved, if your printer still produces inaccurate colour, a custom printer profile usually cures the problem, so long as your printer is consistent.
- Always adjust your monitor to agree to an accurate printer, never the other way around! Download our free accurate colour calibration print/JPEG image by clicking the blue link below. This will show you whether your printer is accurate and highlight 11 essential components to an accurate print. If your printer is not accurate, we can supply a free custom ICC Printer Profile and free technical assistance to ensure your printer is correct for colour and density. You can also use soft proofing (simulating print output on your monitor) and hard proofing (printing test prints) to check for inaccuracies before final printing.
- Remember, your screen is backlit so you need to view your prints under correct controlled lighting. The next best thing to this would be next to a window.
Mistake 4: Low level printer with High print aspirations

By far the most common mistake photographers make; beautiful, accurate detailed images are destroyed during the printing process by the use of low specification, cheap document inkjet printers, all-in-ones or old printers that are no longer up to standard.
This is also true of designers/illustrators who have large sized images with high expectations. While cheap printers may be suitable for basic home or office tasks, they are not designed for high-quality photo printing.
Our Advice / Fix:
- Consult your photographic equipment supplier to ensure that your printer does justice to your DSLR and images. For 2025, Epson SureColor SCP700 and Epson SureColor SCP900 or Canon Pro 200, Canon Pro 300 and Canon Pro-1100 are all excellent choices which suit the output from a professional standard DSLR for colour and black & white.
- Use the right printer for the job – ideally using pigment ink. If you sell your inkjet prints, steer clear of dye-based printers. Use only pigment ink inkjet printers for best image stability and monochrome appearance. If you are struggling with an old unreliable printer – replace it.
Mistake 5: Wrong image editing software

Many photographers make the mistake of using very basic image editing software for printing. For example Mac Preview or Windows Photo Viewer which offer limited colour management and low level editing tools creating unnecessary challenges in your workflow.
Although adequate for rudimentary printing, low-end imaging software usually does not accommodate an easy route to colour management.
Our Advice / Fix:
- Use Adobe Photoshop / Elements / Lightroom or similar – these programs allow simple, reliable accurate colour management with excellent editing tools. Full colour Management is essential for high end printing.
- Try the 30 day Free Adobe trial and test for yourself!
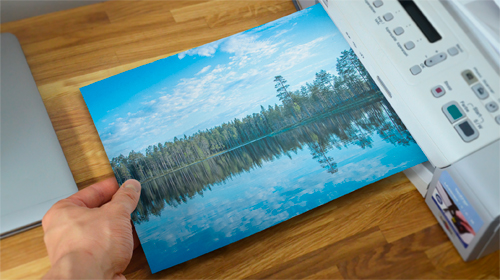
Mistake 6: Wrong Paper / Careless Handling

Uncoated or cheap inkjet paper loaded with artificial fillers often result in poor definition in colour without a good rich black, ink bleed with no sharp edges and generally a bland, poor version of your original colour image. Do you achieve a good rich black? – Are your block colours crisp and sharp at the edges? – Do your photographic images exhibit rich tone? – Do you achieve a true black & white with no colour bias? – Do you have smooth graduations and correct healthy fleshtones?
Our Advice / Fix:
- Test good quality inkjet papers, and see the difference for yourself. Make sure you print on the correct (coated) side of the paper; usually face side up in the box – the coated side is normally a little sticky on your tongue!
- It is also important that once you have a quality inkjet paper, this is handled correctly. Ensure it is laid flat at all time and handle this at the edges being careful not to touch the coated surface. Inkjet paper, especially Matt and Fine Art, absorb moisture. Therefore unless it’s in the process of being printed, always keep the paper in its box with the lid firmly closed. Keep the paper out of extreme temperatures and humidities and away from direct sunlight. CLICK HERE to sample our 6 best selling papers for less than £1.50 →
- Don’t be tempted by cheap high street papers if you seek professional photographic print quality
Mistake 7: Wrong printer driver
If you have incorrect, obsolete, or more than one of the same printer driver, this can cause issues. Additional printer drivers are often installed without warning!
Our Advice / Fix:
- To start, we recommend you always connect your printer to your computer via cable for high quality printing, do not trust wifi.
- Periodically check your printer drivers (contact us if you can’t find the location of your drivers). Ensure you delete any obsolete printer drivers or any that you never use. Also check for duplicates and delete the incorrect driver. Your printer driver list should always be nice and clean!
- Make sure you have the most up to date printer driver suitable for your printer and operating system, especially if you are using older printers or operating system.
- If you are unsure you have the correct driver or having issues, contact the Manufacturer of your printer to put your mind at ease.
Mistake 8: Bad Inks
Never use cheap high street compatibles for your photographic printing; you may produce completely different graduations from one colour to another resulting in washed out colours and even banding. Many compatible inksets are made up with a mixture of high-contrast signage inks for some colours, and perfectly acceptable photographic inks for the remainder.
Our Advice / Fix:
- If your market is very high-end, allowing you to charge high prices for your work, using OEM brand inks like Canon, HP or Epson would work – your profit margin should allow you to work in this way. Higher volume inkjet printing in more competitive markets; use quality third-party inks – choose your printer to work with the best bulk inks available – our customers often consult with us before buying a new printer, to ensure that they can run an economic quality bulk ink for colour, monochrome and graphics.
- To create a stable print with accurate colour reproduction, good rich blacks and smooth even graduations in every colour channel, use the Brand OEM inks, or reputable bulk professional photographic inks only. Don’t risk wasting expensive paper with poor quality ink
Mistake 9: Wrong image size and spec

Using the incorrect images size can result in a pixelated or a distorted/blurry print that looks truly awful.
Our Advice / Fix:
- Ensure that you capture enough pixels/Mb for the size of print you want to produce; do not expect a great A3 print from an original image measuring a fraction of a Mb! – as a rough guide, an A4 print needs at least 2 Mb of original image information – 8 Mb or more is best for A4.
- Resize your image for printing in your desired size at a resolution of between 180 to 360 pixels per inch (most photographers use 300 ppi) – many DSLRs give you a resolution of 72 ppi, which is wrong for printing, but easily resized.
- Ensuring the correct image size and spec will ensure sharp, high quality prints. A general rule is 300 dpi for high quality prints.
- Remember also that cropping an image cuts file size by a surprising amount. If you have the option ensure the colour is set to 8 bit/Channel, never 16 bit/Channel as this is too much information and can lead to lines/banding in various areas in your print.
Use every Genuine Camera Sensor Pixel in your prints – use all available pixels from your camera sensor – see below:
Mistake 10: Printing too quickly

Many photographers spoil their prints by being impatient.
Our Advice / Fix:
- Set your print resolution to highest quality / no high speed for best photographic results. If you need faster print production, test your printing at lower resolutions to see if a faster lower res print is acceptable to you.
- Production speed vs quality – Many production inkjet workers get regular custom printer profiles for their stock papers for best colour accuracy and tone, then test print for best print speed and acceptable quality. Fast print speeds hugely increase daily print output and profit, but do check that your nozzle check is absolutely perfect – higher print speeds are much less forgiving of a less than perfect nozzle check performance, particularly in blocks of colour and smooth graduations.
Bonus Mistake: Over-adjusting images
Reviewing your images on screen often leads you into a common trap; over-adjustment until they look good on the monitor (sharpening / contrast / colour saturation) which often results in a bad overcooked print and unnatural appearance.
Better to test print an unadjusted image, straight from your digital camera, or original image, and review sharpness / colour / impact according to your test print, then keep your adjustments subtle – you are more likely to retain true photographic image quality.
Use your monitor as a rough guide, of course, but remember to keep your adjustments small and subtle – computer screens usually persuade you to over sharpen and over adjust!
This advice also applies to RAW processing controls while viewing a small preview window on an inaccurate monitor.
Marrutt Advice / Fix: Edit in moderation – Less is more!