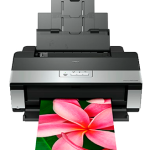
Epson Stylus Photo R2880 Printer Support
See below for a selection of help topics and videos showing you how to get the most out out your Inkjet Printer - Performance, Reliability and Print Quality!

ICC Printer Profiles and Colour Management for Epson R2880
SECTION CONTENTS (click to jump to):
What is a Profile – Generic ICC Profiles – Marrutt Custom ICC Profiles – Step by Step Installation – Common ICC Profile FAQs
What is a Profile?
![]() A Profile is a file that describes how an input or output device handles colour.
A Profile is a file that describes how an input or output device handles colour.
As all printers come with colour biases and colour & density errors. Therefore, it is necessary to install a profile to achieve accurate colour from your printer.
THE BEST TIP OF ALL: Problem prevention is always better than problem solving! Turn you printer on for a few minutes once every few days – especially when you are not using your printer for long periods. When you turn a printer on, it goes through a mini head-clean which can prevent the build up of dried ink on the underside of your ink head. – If you go on holiday, why not leave your printer switched ‘on’ and connect your print to the mains through an inexpensive central heating timer switch, set to turn on for a few minutes every other day – when you return, your print head will be in perfect order, ready to print.
For dirty rollers or poor paper feed action, we recommend Platen Cleaner Spray. This will remove any build-up of dried ink or paper fibres. We advise you to use this spray applied to a sheet of paper to create a cleaning sheet, which will maintain your inkjet roller friction, and maintain good paper feed characteristics.
Generic Profiles
 Marrutt ICC Profiles: Marrutt Pro Inks are formulated to provide a close match to the original OEM brand inkset, so for normal-basic printing simply use the usual Epson print settings to provide good standard accuracy in colour and black & white with correct print density (plug and play).
This is particularly useful when printing from non-Adobe Photoshop applications, which do not support colour management. For more colour-critical printing, we recommend obtaining a Marrutt Custom Profile. Click the Custom Profiling link above for further details of this service.
Marrutt Custom Profiling
 This service is available to all our ink and paper users. Simply Contact us and we will send you the instruction PDF and Test Target you need to obtain your free custom profile.
Once you receive, install and start using your custom profile, you then have the capability of creating superb accurate colour prints with beautifully smooth colour tone graduations, showing excellent shadow detail, also retaining highlight detail also (provided your original image file is also of excellent quality!
A custom ICC profile also improves your printers’ black and white performance with your neutrals and shadow detail dramatically improving.
You will spend a lot less time in Adobe Photoshop, adjusting out printer distortions, colour bias errors etc.
ICC Profile Installation
 Profiles needs to be installed into your hard drive and then selected in Adobe Photoshop.
The profile is installed by dragging your profile(s) into the correct folder, and can be confusing as it depends on your operating system, the paths to get to this folder are found below:
PC USERS:
Microsoft Windows 10: Click start button – Control Panel – In the search box, type “color management” and then click Color Management – click the All Profiles tan tab, and then click Add – Locate and select the new color profile and then click Add – Click “Close” – you can then re-start photoshop and select your profile
Windows 7/8 = Open computer – c: – windows – system32 – spool – drivers – then drag and drop into the color folder. Then Restart Photoshop.
Windows Vista / XP = Right-click on the profile you require on the CD and select “Install Profile” from the context menu. Then Restart Photoshop. Or, to manually install = my computer – c: – windows – system32 – spool – drivers – then drag and drop into the color folder. Then Restart Photoshop.
Windows 2000 = my computer – c: – windows – system32 – spool – drivers – then drag and drop into the color folder Then Restart Photoshop.
Windows 98 = my computer – c: – windows – system – then drag and drop into the color folder. Then Restart Photoshop.
MAC USERS:
Mac OSX* = MacHD – Users – imac(home) – library – colour sync – then drag and drop into the profiles folder . Then Restart Photoshop.
Mac OS9 = MacHD – system – then drag and drop into the colorsync profiles folder. Then Restart Photoshop.
*Installing Profiles for OS X Yosemite, El Capitan and Sierra Users = Some of the colorsync profiles may be located in the hidden library file for your user account. Hold down the option key as you access the GO tab in the Finder menu. This will reveal the hidden library file. Macintosh HD/Users/Username/Library
Selecting your Profile / Photoshop Advice:
You need to ensure that after you’ve installed your profile you re-start photoshop (if already opened). Once you re-open Adobe Photoshop, you will be able to select the profile is the print preview screen. This will only happen after you have selected “let Photoshop Determine Colors”.
If you are using Adobe Photoshop Elements, always select “ALWAYS OPTIMIZE FOR PRINTING”. In the Print preview screen you will then be able to select “more options” then “Color Management” to select your profile.
ICC Profile FAQS

Q: Why might I need a custom profile?
A: Any users happily print using the standard free downloadable ICC printer profiles available by emailing us with your printer model, Inkset and operating system – but remember, consumer quality desktop inkjet printers are manufactured to a certain production tolerance – no two printers will be identical, and tend to vary one to another to a greater or lesser degree. The answer to this for those photographers who have high printing standards is to decide which is their favourite paper, then get a custom profile written for the printer/paper combination.
The pay-off is that you will be creating superb accurate colour prints with beautifully smooth colour tone graduations, showing excellent shadow detail, also retaining highlight detail also (provided your original image file is also of excellent quality! – You will spend a lot less time in Adobe Photoshop, adjusting out printer distortions, colour bias errors etc.
Q: Why can’t I print what I see on my monitor?
A: What makes you think that your monitor is accurate? – If you have an accurately profiled printer, then the print that you produce will agree to the digital values contained within your image file. As a completely separate issue, if you have a good quality monitor which has not deteriorated too much with age, you should be able to adjust your monitor through Adobe Gamma to give reasonably accurate colour rendering, or use a monitor “spider” to do the job automatically.
Theoretically, if your monitor is adjusted for accurate colour, and your printer is profiled accurately, these two colour devices should in reasonable agreement. Beware of the common problem where you are using an inferior quality colour monitor, or your monitor has deteriorated with age (each CRT colour gun may have reduced in output to a different degree, giving you an inaccurate colour display). – Never assume that your monitor is accurate just because images ‘look good’ on screen!